Aluminized heat sheathing may seem like a very easy item to install, which it is. However, here is a short tutorial with some tips included to make sure your sheathing holds up the way it should.
 Before you begin, you’ll need:
- Scissors
- Stapler
- Measuring Tape
- Aluminized Heat Sheathing
- Zip ties (optional)
Steps to Install
- Measure the wire, tube, hose, ect… that you plan on covering with the section of heat sheathing.
- Measure out the heat sheathing section and make sure you have enough to cover it.
- Mark the sheathing where you plan to cut it if you need a short section.
- After cutting the sheathing we suggest you staple the sewn edge of the sheathing just below where you made your cut. This is to ensure that the sheathing does not pull apart or unwind at the stitch while installing.
- Install the sheathing over the item you are protecting, taking care not to get any type of fuel/oil or any type of flammable liquid on the sheathing as this can become a fire hazard.
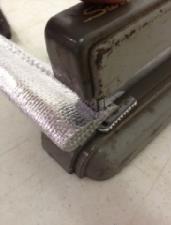
- If necessary, use zip ties to secure both ends of the sheathing to hold it in place.